Customs Clearance User Guide
Introduction
This guide is for users of our Customs Pro™ integration which allows the management of Routes and Clearances to help reduce the time spent on administration of clearances, as well as reduce the possibility of mistakes due to data entered incorrectly, etc.
Customs Routes and Clearance Requests
A route can have 1 or more clearances associated to it.
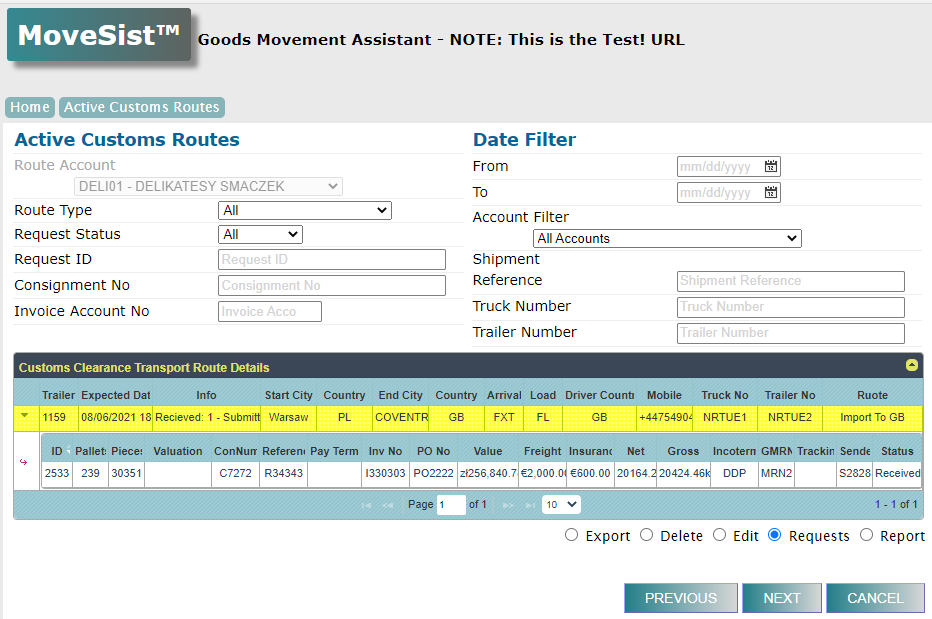
To view Routes and Clearance Requests already on the system – click on Active Customs Routes.

To view each clearance linked to a route, click on the down arrow in the left-most column of the route.
This will expand the row to show the clearances directly below the route you clicked.

Time needed: 5 minutes.
Adding Additional Clearance Requests to an existing Route
- Select the Route to add to
The selected route is highlighted.
- Select the Add radio button

- Click NEXT
This will take you into the New Customs Request wizard.
- Editing Existing Customs Clearance Requests
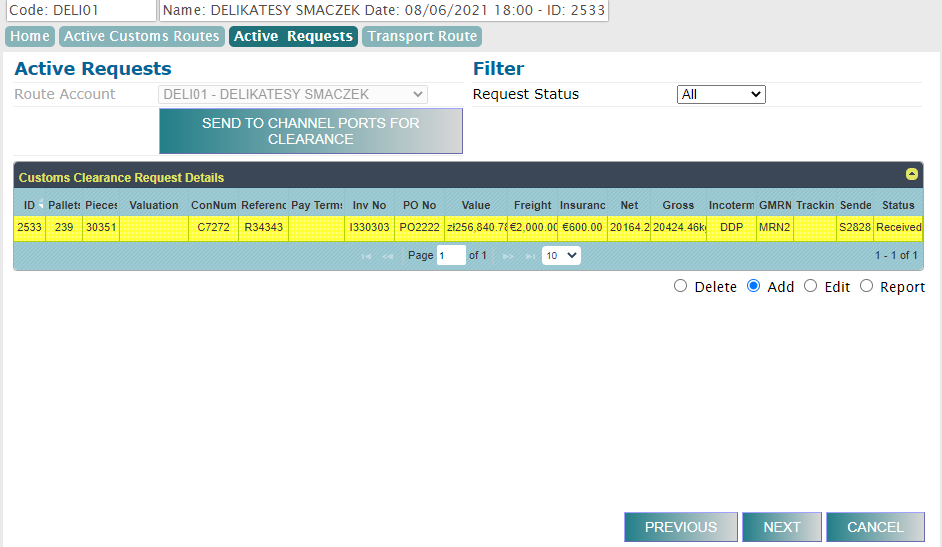
To Edit a Request, select the Edit radio button and click NEXT.
Note: It is only possible to Edit a request if it has not yet been Submitted. If the Status is ‘Submitted’ it means the request has already been sent to Customs Pro and cannot be changed.
New Customs Request
To create a new clearance, click on New Customs Route to load the customs route wizard.

When all the required information has been filled in, click on NEXT.
If the Next button is disabled / greyed-out, check that all the fields labelled with the red * are filled in correctly.
The next page is where you start to enter the details for the clearance itself. There is a link below for each page in the wizard, where you can find more information on how to use each page.
Navigation Menu
Below is a screenshot of the navigation menu for the Customs wizard.
The page you are currently on will be highlighted. In the example below it is the Consignment page.

At any point you can click any of the other pages to go forwards or backwards to make changes.
